2015年3月1日
Nagios notification_options 参数含义
host_notification_options:
d = notify on DOWN host states,
u = notify on UNREACHABLE host states[……]
Zack_Hou

host_notification_options:
d = notify on DOWN host states,
u = notify on UNREACHABLE host states[……]
例如check_load -w 15,10,5 -c 30,25,20这个命令的意义如下
当1分钟多于15个进程等待,5分钟多于10个,15分钟多于5个则为warning状态
当1分钟多于30个进[……]
故事发生背景
nagios服务器ip地址突然更换,导致所有的机器监控不到了,(只剩下之前两台通过写nagios域名地址的机器幸免)
然而在我把被监控机器的nagios地址更改为nagios[……]
下载check_mysql_health-2.1.8.2.tar.gz
我自己网盘的下载地址http://pan.baidu.com/s/1dDgtRR7
# tar -zxf check_m[......]
cd /usr/local/nagios/libexec
编写插件
vim check_ip_cons.sh
#!/bin/bash

#tcp connet

if [ $# != 2 ];t[......]
今天带来的是软raid0的创建
(环境centos7)
1、首先
# fdisk –l查看当前磁盘列表
其中这四块是今天要用来做raid0的
Disk /dev/sdc: 1098.4 GB[……]
上传nagios-plugins-2.0.3.tar.gz nrpe-2.15.tar.gz
tar –zxf nrpe-2.15.tar.gz tar –zxf nagios-plugins-2.0.3.tar.gz
创建nagios账户并设置密码(被监控主机上安装:
# groupadd nagios
# useradd -g nagios -d /usr/local/nagios -s /sbin/nologin nagios)
#useradd nagios
#passwd nagios
#cd nagios-plugins-2.0.3
#./configure
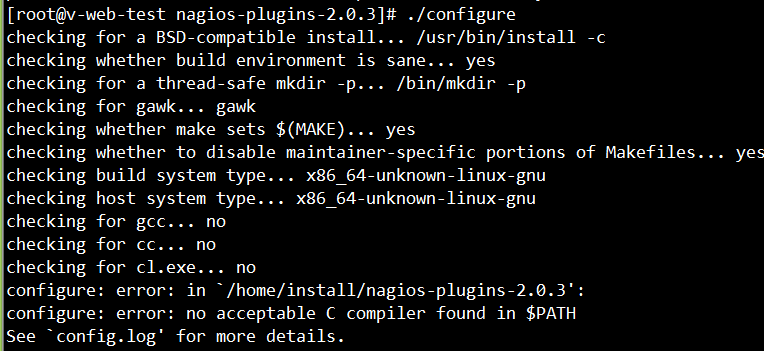
报错没有安装gcc
#yum install gcc –y
再次执行
#./configure
出现下图说明编译makefile成功
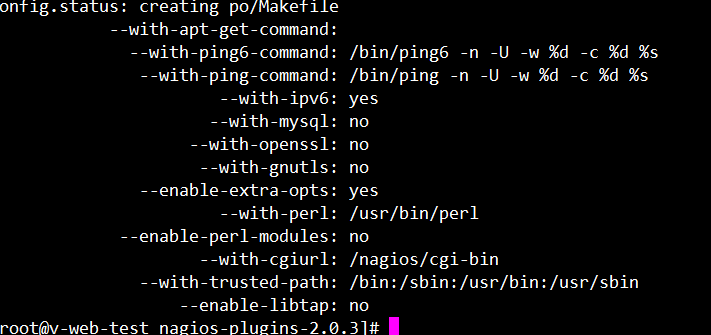
#make && make install(制作并安装)如果没有错误信息则安装成功(特么这不是废话吗?)
对相关的目录设置权限和所属用户组
# chown nagios.nagios /usr/local/nagios
# chown –R nagios.nagios /usr/local/nagios/libexec
Nrep包安装
把NRPE包放到/usr/local目录下,按照下面的步骤解压缩,并且编译和安装:
# ./configure(Ubuntu安装nrpe #./configure --with-ssl-lib=/usr/lib/x86_64-linux-gnu[......]
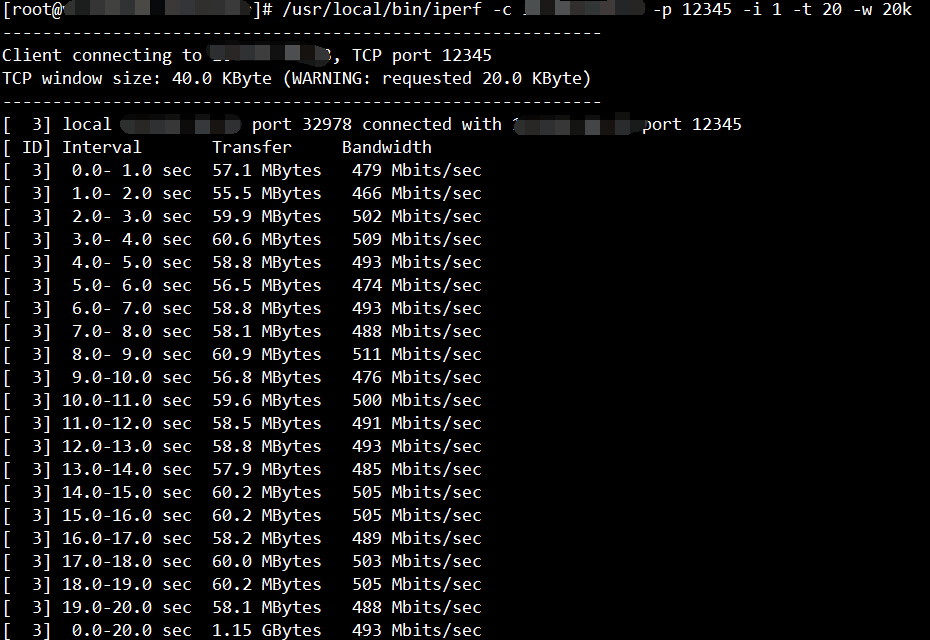
首先去https://iperf.fr去下载iperf
解压
#tar -zxf iperf-2.0.5.tar.gz
#cd iperf-2.0.5
#./configure
#make[……]
用ulimit -a可以查看当前系统的限制是多少
[root@****]# ulimit -a
core file size (blocks, -c) 0
data seg size (kb[……]
网卡流量状况 CRITICAL 01-19-2015 10:16:30 1d 11h 26m 34s 4/4 CHECK_NRPE: Socket timeout after 10 seconds[……]
执行./check_cpu.sh报错
解决方法
centos(redhat)yum install -y sysstat
ubuntu apt-get install sysstat[……]
CentOS:
1、首先设置一下系统的时区,请使用如下命令
#cp /usr/share/zoneinfo/Asia/Shanghai /etc/localtime
2、然后使用主n[……]
tcpdump -i eth0 -c 500 -w xxxeth0.cap
-i eth1 只抓eth1口的数据
-c 500代表数据包的个数,也就是只抓500个数据包
-w xxxeth0[……]
公司要安装项目管理系统,采用redmine,新来的我就来做这个小小的任务了,中途也出过几次问题,搭建redmine,他的依赖包很多,所以我建议用apt装,下面开始吧。
首先升级一下源
apt-ge[……]
一、SVN安装
1.安装包
$ sudo apt-get install subversion
2.添加svn管理用户及subversion组
$ sudo adduser svnuser[……]